In this step-by-step tutorial, I will guide you through the process of constructing a basic PHP extension / module from scratch.
Additionally, we’ll delve into establishing a development environment for PHP extension development with a C debugger in Visual Studio Code.
What is a PHP extension?
PHP extensions (or PHP modules) - are libraries that provide additional functionality to the PHP scripting engine. They are written in C and compiled into a shared library that can be loaded dynamically into the PHP runtime.
Good examples of PHP extensions are the MySQL and GD extensions.
Here is a detailed explanation of what a PHP extension and what is the difference with Zend extension.
Setting up the development environment
You need to have Docker installed on your machine. If you don’t have it, you can download it here. Also, you need to have Visual Studio Code installed. You can download it here. To work with C code, you need to install the C/C++ extension for Visual Studio Code, which you can find here. Additionally, you need to install the Docker Dev Containers extension in Visual Studio Code, available here.
All commands to build and run in one place
Below, you will find an explanation of all the commands we will use in this tutorial. However, if you want to build and run the extension right now, you can execute the commands below.
Clone my repository, which contains all the files we will use in this tutorial. I have tested all commands on macOS. If you are using a different operating system, you might need to adjust some configurations.
To clone the repository, run the following command:
git clone [email protected]:bogkonstantin/php-extension-hello-world.gitNext, navigate to the directory:
cd php-extension-hello-worldAnd run the command to build the container:
docker build --pull --rm -f "Dockerfile" -t php-dev:latest "."Then, you need to run the container and attach to it:
docker run --rm --name php-dev -it php-dev bashUsing the command below, you can test the functionality of the extension. Run the following command from inside the container:
php -r "echo hello_world() . PHP_EOL;"Hello World PHP extension source code
The extension consists of three files: php_hello.h, hello.c, and config.m4. The first one is the header file, used to declare functions and classes of the extension. The second one is the source code of the extension, and the third one is the configuration file for the extension, preparing it for compilation.
Since this tutorial primarily focuses on setting up the development environment, we won’t delve into the details of the extension code. We will simply create a straightforward extension that returns the string “Hello.”
Let’s take a look at the header file (php_hello.h):
#ifndef PHP_HELLO_H
#define PHP_HELLO_H 1

#define PHP_HELLO_WORLD_VERSION "1.0"
#define PHP_HELLO_WORLD_EXTNAME "hello"

PHP_FUNCTION(hello_world);

extern zend_module_entry hello_module_entry;
#define phpext_hello_ptr &hello_module_entry

#endif
The next file is the source code of the extension (hello.c):
#ifdef HAVE_CONFIG_H
#include "config.h"
#endif

#include "php.h"
#include "php_hello.h"

static zend_function_entry hello_functions[] = {
    PHP_FE(hello_world, NULL)
    {NULL, NULL, NULL}
};

zend_module_entry hello_module_entry = {
#if ZEND_MODULE_API_NO >= 20010901
    STANDARD_MODULE_HEADER,
#endif
    PHP_HELLO_WORLD_EXTNAME,
    hello_functions,
    NULL,
    NULL,
    NULL,
    NULL,
    NULL,
#if ZEND_MODULE_API_NO >= 20010901
    PHP_HELLO_WORLD_VERSION,
#endif
    STANDARD_MODULE_PROPERTIES
};

#ifdef COMPILE_DL_HELLO
ZEND_GET_MODULE(hello)
#endif

PHP_FUNCTION(hello_world)
{
    zend_string *str = zend_string_init("Hello", sizeof("Hello")-1, 0);
    RETURN_STR(str);
}
And the last one is the configuration file (config.m4):
PHP_ARG_ENABLE(hello, whether to enable Hello World support,
[ --enable-hello   Enable Hello World support])

if test "$PHP_HELLO" = "yes"; then
  AC_DEFINE(HAVE_HELLO, 1, [Whether you have Hello World])
  PHP_NEW_EXTENSION(hello, hello.c, $ext_shared)
fi
Building the PHP in debug mode and extension
At first - you need to build PHP from source with the --enable-debug parameter. Below, you can see the Dockerfile. It will build PHP 7.4 with debug symbols and all the other tools we need for building and developing PHP and an extension.
Since this Dockerfile provides instructions for Debian, you can use it as a base to set up a development environment on your machine. However, it’s much easier to use a ready-to-use Docker image.
The full Dockerfile looks like this:
FROM debian:bookworm

RUN apt update \
    && apt install -y \
    build-essential \
    autoconf \
    libtool \
    bison \
    re2c \
    pkg-config \
    git \
    libxml2-dev \
    libsqlite3-dev \
    gdb \
    nano \
    procps

RUN git clone https://github.com/php/php-src.git --branch=php-7.4.33 --depth=1 \
    && cd php-src \
    && ./buildconf --force \
    && ./configure --enable-debug \
    && make -j $(nproc) \
    && make install \
    && php -v

COPY ./ext /php-src/ext/hello

WORKDIR /php-src

RUN cd /php-src/ext/hello \
    && phpize \
    && ./configure --enable-hello \
    && make \
    && echo "extension=/php-src/ext/hello/modules/hello.so" >> /usr/local/lib/php.ini

COPY ./launch.json /php-src/.vscode
Let’s examine the Dockerfile in detail. Firstly, we are using Debian 12.4 Bookworm in this tutorial.
This part involves the installation of essential tools for building PHP and extensions:
apt update
apt install build-essential autoconf libtool bison re2c pkg-config
A few other tools we need in this tutorial:
# for cloning php-src
git

# since we going to build using default configuration, we need this libraries:
libxml2-dev libsqlite3-dev

# c debugger
gdb
Next, we are cloning the PHP source code. We are using PHP 7.4.33 version in this example. You can use any version you prefer; just change the branch name accordingly. However, for PHP 8+ versions, you need to adjust the extension code, as the PHP internal API has changed.
Setting Depth=1 means we are cloning only the latest commit, saving both time and space.
git clone https://github.com/php/php-src.git --branch=php-7.4.33 --depth=1Inside the /php-src directory, we are building PHP with debug symbols, which will be used for debugging.
./buildconf
./configure --enable-debug
make -j $(nproc)
This command is used to install the previously built PHP:
make installAnd check if it is installed correctly:
php -vNext, we are building the extension. The extension is located in the /php-src/ext/hello directory and is copied during the build process to the image:
cd /php-src/ext/hello
phpize
./configure --enable-hello
make
Add the extension to the php.ini file:
echo "extension=/php-src/ext/hello/modules/hello.so" >> /usr/local/lib/php.iniThis is not in the Dockerfile, but if you want to rebuild the extension later, you might need to clean it first:
make clean allDebugging with CLI (gdb)
For easy development, you need to use a debugger. GDB is already installed in the container. You can debug using the CLI from inside the container. Below, you can see an example of debugging:
gdb php
break /php-src/ext/hello/hello.c:36
# Make breakpoint pending on future shared library load? (y or [n]) y
run -r "echo hello_world() . PHP_EOL;"
You will see the breakpoint was triggered:
Breakpoint 1, zif_hello_world (execute_data=0xfffff5413090, return_value=0xfffff5413070)
    at /php-src/ext/hello/hello.c:36
36	    zend_string *str = zend_string_init("Hello", sizeof("Hello")-1, 0);
To learn more about debugging with GDB, you can read tutorials on the internet, such as this one. It might not be straightforward, but it is a very powerful tool.
Debugging with VSCode
Debugging with the CLI is not very convenient. It is much easier to use VSCode. After you run a container, you can attach to it using VSCode. Open the Command Palette and type “Dev-Containers: Attach to Running Container…”. Select the container you want to attach to. After that, you will be attached to the container, and you will see files from the container in VSCode.

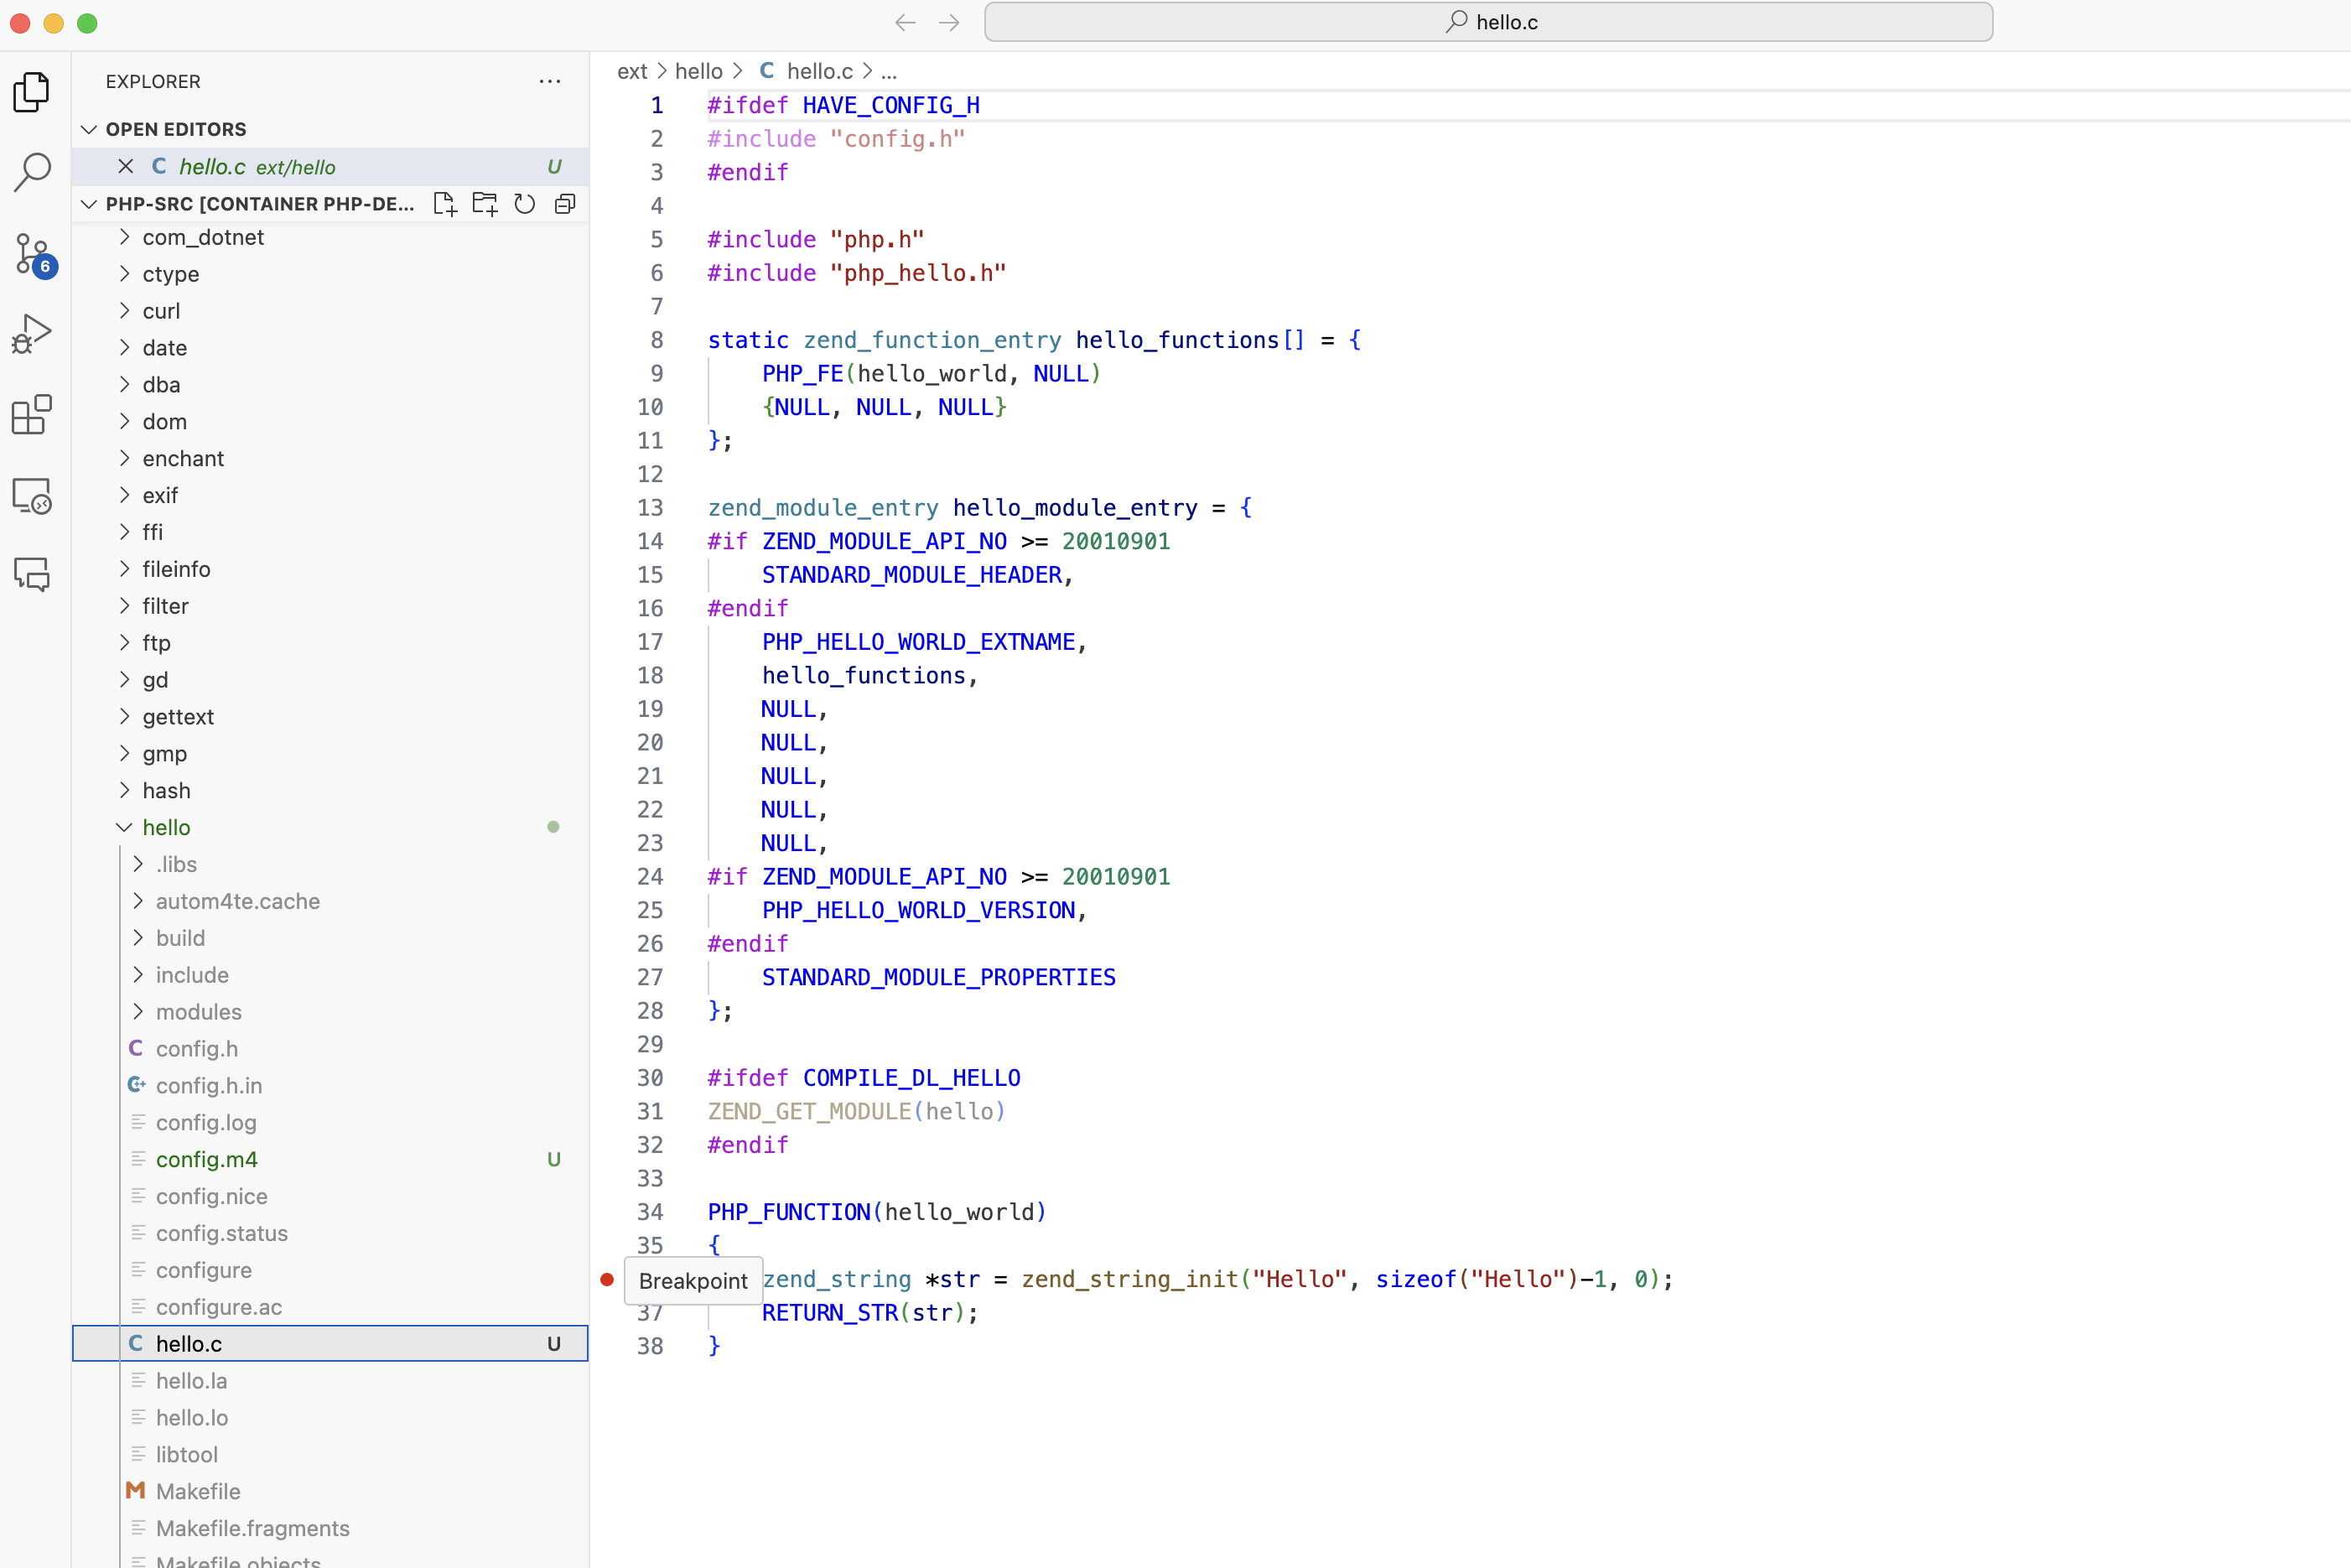
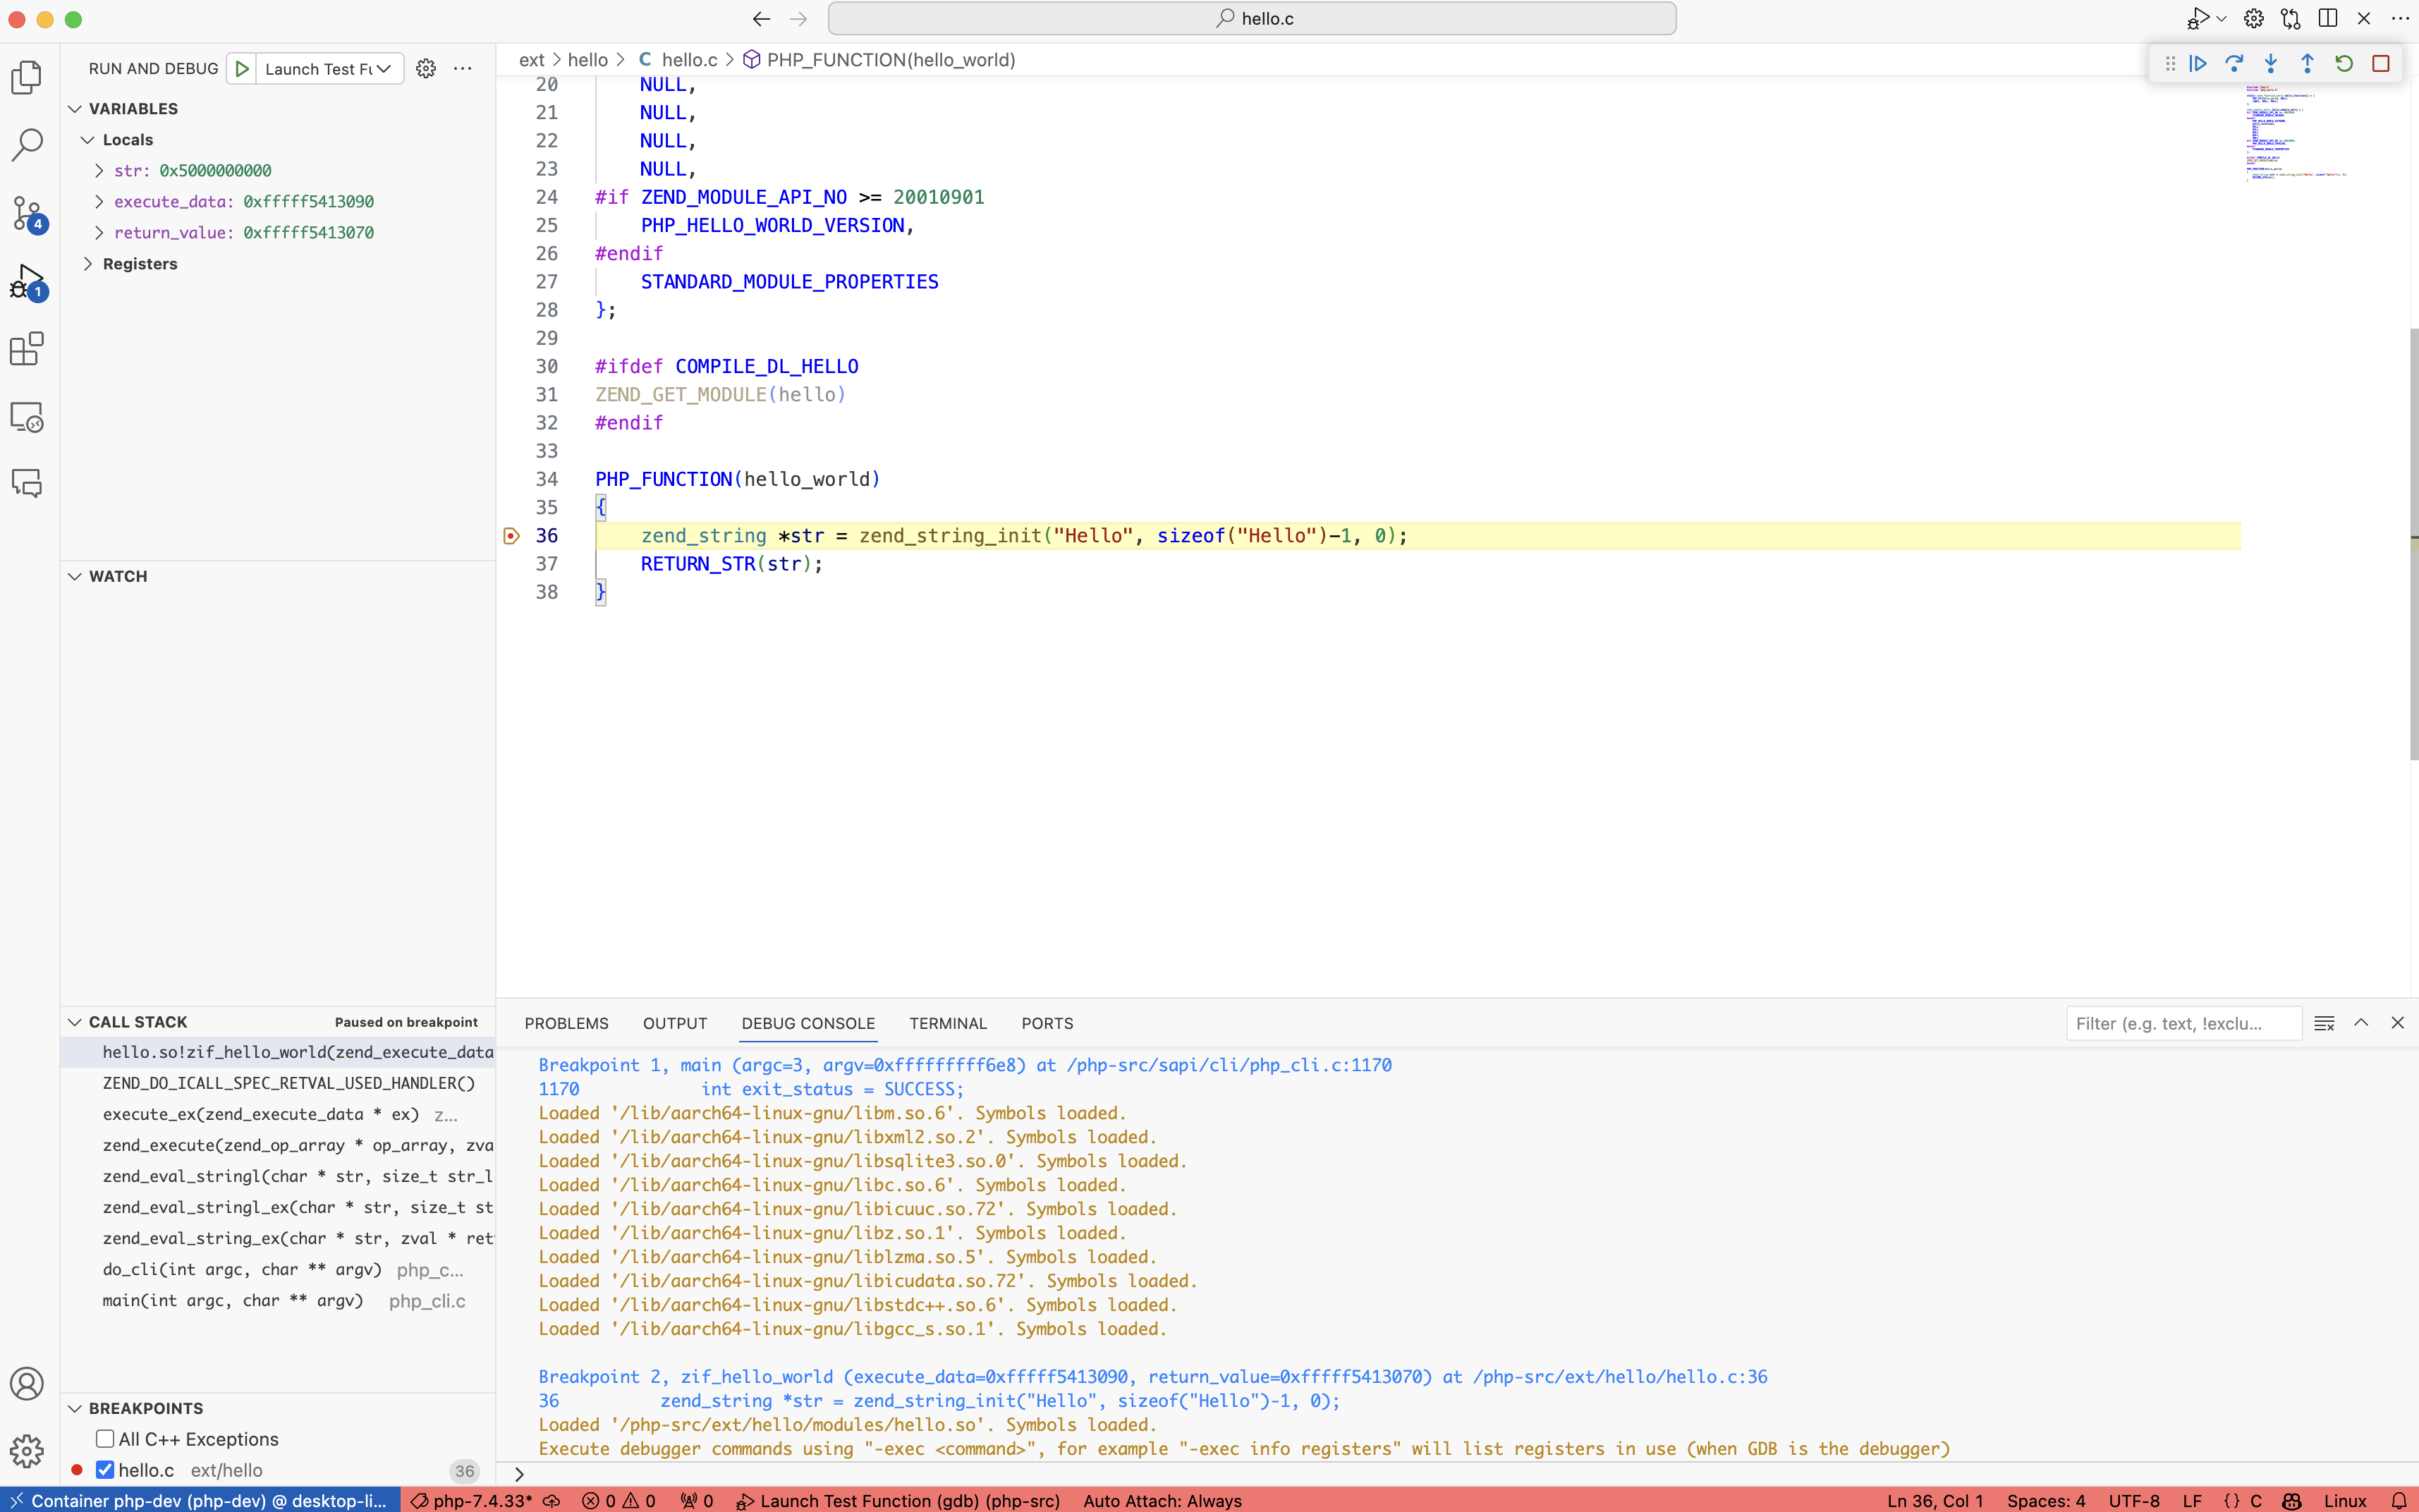
You can find the configuration in the .vscode/launch.json file, which is already copied to the container. You can use it for debugging. Just set a breakpoint in hello.c (path inside the container: /php-src/ext/hello) and click on the “Start Debugging” button. You will see the breakpoint was triggered.

In the last screenshot, you can see a successfully triggered breakpoint.

Summary
In summary, this tutorial equips developers with the essential skills to create and debug PHP extensions efficiently. By seamlessly integrating Docker and Visual Studio Code, the process becomes more accessible, fostering a smoother development experience.
